English (see page EN 1-15) Français (voir pages FR 1-13) Polski (patrz strony PL 1-20)
|
|
|
- Patrycja Małek
- 10 lat temu
- Przeglądów:
Transkrypt
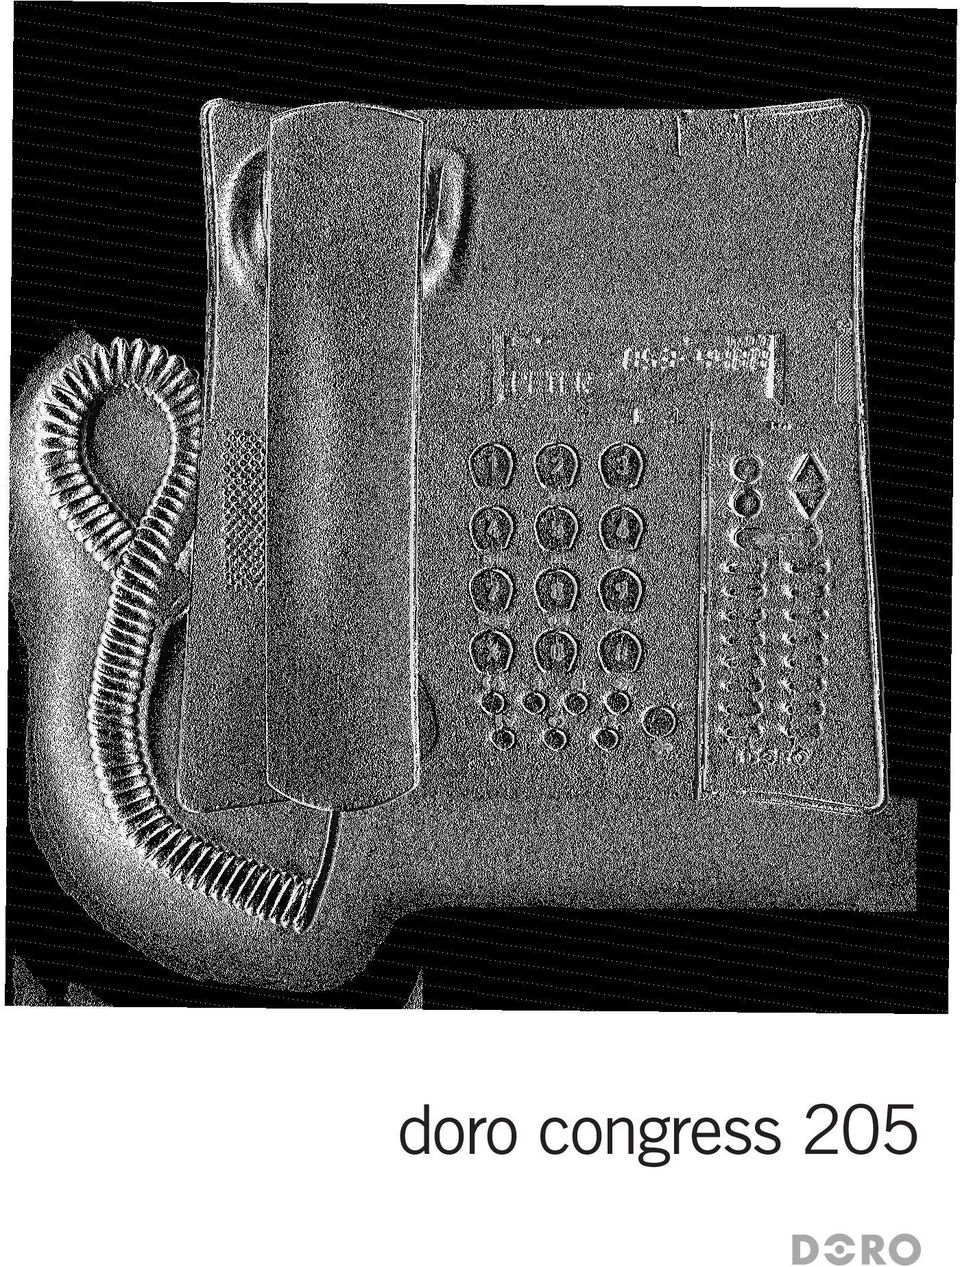
1 doro congress 205
2

3 English (see page EN 1-15) 1 Input socket for additional equipment 2 Recall button 3 Handset/Headset volume control 4 Redial button 5 Mute button and LED 6 Headset button and LED 7 Store button 8 Hands free button and LED 9 One-Touch memories 10 Caller ID/Phone book 11 Clear/OK button 12 Scroll UP/DOWN buttons 13 Ringer/Message waiting indicator 14 Speaker volume control (on the underside) 15 Call number Français (voir pages FR 1-13) 1 Prise pour connexion modem (Dataport) 2 Touche R 3 Touches de réglage du volume du combiné/ casque 4 Touche Bis 5 Touche Secret 6 Touche Casque avec LED 7 Touche de programmation 8 Touche Mains-libres avec LED 9 Touches des mémoires directes 10 Touche du journal des appelants / répertoire 11 Touche pour effacer/ok 12 Touches de défilement 13 Témoin de message et de sonnerie 14 Molette de réglage du volume du haut-parleur (sur le côté droit de l appareil) 15 Touche de numérotation Polski (patrz strony PL 1-20) 1 Podłączanie dodatkowych urządzeń 2 Przycisk przełączania na inny nr wew. 3 Regulacja głośności słuchawki/zestawu słuchawkowego 4 Funkcja ponownego wybierania 5 Wyłącznik mikrofonu z kontrolką 6 Przycisk i kontrolka zestawu słuchawkowego 7 Przycisk zapisywania 8 Przycisk i kontrolka trybu głośnomówiącego 9 Pamięci szybkiego wybierania 10 Identyfikacja numeru dzwoniącego/książka telefoniczna 11 Wyczyść/OK 12 Przyciski przewijania 13 Sygnalizator wiadomości oczekującej i dzwonka 14 Regulacja głośności głośnika (pod spodem) 15 Wybierz numer

4 English Installation Important! The earpiece of the handset may attract small ferromagnetic objects such as staples and pins, care should be taken when placing the handset near these items. Batteries The telephone requires 3 x AAA 1.5V alkaline batteries. When the batteries are running low will be displayed. The batteries will maintain the telephones functions for a few days and prevent the loss of Caller ID, memories and other functions in the event of a power failure. 1. Check that the mains adapter is correctly connected to avoid losing stored information. 2. Disconnect the telephone line cord from the network wall socket. 3. Remove the battery cover by pressing a small screwdriver (up to Ø 2.5mm) or similar into the hole to the side of the battery cover. 4. Install the batteries ensuring that the correct battery polarity is observed. 5. Replace the battery cover. Connection/Initial programming 1. Connect the curly cord to the handset and to the socket marked q on the underside of the telephone. 2. Place the handset into the cradle. 3. Connect the mains adapter to the DC 9V socket on the underside of the underside of he telephone, and an electrical wall socket. 4. The display will now flash the alarm setting. 5. If the alarm is not shown press and hold v until the alarm setting flashes. 6. Press Select the required language using v/v. Press Select the desired contrast setting (3=normal) using v/v. Press Set the correct hour (00-23) using v/v. Press Set the correct minute/s using v/v. Press Set the correct day using v/v. Press Set the correct month using v/v. Press Select the required pause setting (2 seconds=normal) using v/v. Press Please refer to Batteries above regarding the installation of back up batteries. 15. Connect the telephone line cord to the socket marked T on the telephone, and to a telephone network wall socket. 16. Lift the handset and listen for the dial tone. Your telephone is now operational. EN 1

5 English Installation Changing the clock, alarm settings, language or contrast If you wish to alter the clock, alarm, language or contrast settings at a later point please refer to Connection/Initial programming (steps 5-12) on page 1. The display In standby mode the date and time, number of new and total number of calls stored in the Caller ID memory will be displayed. Ringer The ringer volume, melody and tone can be selected using the switches located on the underside of the telephone: e n Ring volume Ring melody Ringer tone Labels/protective cover The back cover is fastened by 2 pieces of plastic and secured by two screws, these have to be removed first. Information such as a company logo can be placed under the protective cover. This is especially useful where the back of the telephone is facing a customer/ visitor on a reception desk. The memory index cover can also be removed by carefully prising the right hand side of the cover using a small flat blade screwdriver. EN 2

6 English Operation Making a call Regular dialling 1. Lift the handset, dial tone will be heard. 2. Dial the required telephone number. Pre-Dialling You can enter and correct a telephone number before dialling. 1. Dial the required telephone number. Mistakes can be erased using C. 2. Press OR press s to dial the number. If you wish, you can switch between handset and hands free mode by simply pressing s or lifting the handset. Redial The five most recently dialled numbers can easily be redialled using: 1. Repeatedly press r to scroll through the dialled numbers. 2. Press OR press s to dial the number. If you wish, you can switch between handset and hands free mode by simply pressing s or lifting the handset. Volume control The Handset/headset earpiece volume may be increased or decreased during a call. Press $ to increase, or to decrease the volume. To adjust the speaker volume (hands free and group listening) use 3 on the underside of the phone. Recall Press the recall button R followed by the extension number to transfer calls when connected to a PBX (TBR only). Access to additional network services can be gained by using the recall button R, * and # keys. Contact your network operator for more information. Mute button The handset/headset/hands free microphone can be disconnected during a call by pressing z. Press z once more to reactivate the microphone. The z LED will illuminate while the function is active. EN 3

7 English Operation Hands free function 1. Press s. The hands free function will be activated and the LED indicator next to the button will illuminate. 2. Dial the required telephone number. Adjust the volume using the volume control located on the underside of the telephone. 3. Speak towards the microphone located on the front edge of the telephone. 4. Press s to terminate the call. If you wish, you can switch between handset and hands free mode by simply pressing s or lifting the handset. Please note! Please remember that in hands free mode it is only possible for one person at a time to talk. The switchover between speaker and microphone is automatic and dependent on the sound level of the incoming call and the microphone respectively. It is therefore essential that there are no loud noises, e.g. music, in the immediate vicinity of the telephone, as this will disrupt the hands free function. Group listening Group listening allows anyone in the same room as the base unit to hear both parties and follow the conversation through the base units speaker. The ongoing call is not affected and can continue via the handset or optional headset. 1. Lift the handset or press the headset button, dial the required telephone number. 2. Once the call has been connected, press s to activate the Group Listening function. The LED indicator by the button will illuminate and the conversation can then be heard through the speaker. 3. Adjust the volume using the volume control on the underside of the telephone. 4. To deactivate the Group Listening function, press s again. EN 4

8 English Operation Timer Immediately following the connection of a call, a call timer will be shown on the display. The timer is a simple way to help you keep track of how long the call lasts. Connection of a headset An additional headset can be connected to the socket underneath the telephone marked =. To access an incoming call or dial tone press =, to terminate a call press = again. Please note! DORO original headsets are tested and adapted for this telephone. Other types and makes of headsets may be used, though the function and sound quality cannot be guaranteed. In the worst case, these could damage the headset and telephone. This type of damage is not covered by the telephone guarantee. Making a call with the headset 1. Press =. Dial tone will be heard in the headset earpiece and the LED next to the headset button will illuminate. 2. Dial the required telephone number. 3. Press = again to terminate the call. Hearing aid compatible This telephone is hearing aid compatible. Select the T mode on your hearing aid to enable this feature. EN 5

9 English Phonebook Using the Phone book Use the Phone book to store names and telephone numbers. A stored phone number can be dialled using fewer keystrokes than if dialled manually. If you subscribe to a Caller ID service, the name/number of the caller will be displayed when you receive an incoming call (only if the number is stored in the Phone book or one-touch memories). The Phone book will store 20 sets of names and phone numbers, each entry can be up to 16 characters (name) and 22 digits (number) in length. Entries in the Phone book are arranged alphabetically. Letters Each number key has been allocated certain characters. Button Letters/symbols 1... [Space character] + & - / X A B C Å Ä Æ æ å ä ß D E F ë G H I ï J K L M N O Ñ ñ ö P Q R S T U V Ü ü W X Y Z 9 *... ( ) * < > 0...,. :? = 0 Ø #... $ _ %! # Storing names/numbers 1. Press b repeatedly until the symbol b is displayed. 2. Press p. 3. Press p again. 4. Enter the telephone number to be stored (up to 22 digits). Mistakes can be erased by pressing C. Press p. 5. Enter name. Press the corresponding number key one or more times for the first letter (see the table above). Press p. Please note! If you need to insert a pause in the telephone number press r. If you need to change a number, store the new number in the same location as the old one. EN 6

10 English Phonebook Dialling from the Phone book 1. Press b repeatedly until the symbol b is displayed. 2. Scroll through the entries using v/v. To perform a quick-search press the corresponding number button one or more times for the first letter (refer to the table on the previous page). 3. Press to dial the displayed number, or just wait to return to standby mode. If you wish, you can switch between handset and hands free mode by simply pressing s or lifting the handset. Changing phone numbers/names 1. Press b repeatedly until the symbol b is displayed. 2. Scroll through the entries using v/v. To perform a quick-search press the corresponding number button one or more times for the first letter (refer to the table on the previous page). 3. Press and hold p until the display shows EDIT? Press p. 4. Correct the number using C and v/v. Press p. 5. Correct the name using C and v/v. Press p to confirm. Deleting a Phone book entry 1. Press b repeatedly until the symbol b is displayed. 2. Scroll though the entries using v/v. 3. Press C, DELETE? will be displayed. 4. Press and hold C until the displayed telephone number disappears. Deleting all entries in the Phone book 1. Press b repeatedly until the symbol b is displayed. 2. Scroll through the entries using v/v. 3. Press and hold C until the display shows DELETE ALL?. 4. Press and hold C again until all the numbers disappear. EN 7

11 English Memory Memory This telephone has 16 One-Touch memories numbered M1-M16. Once a number has been stored in a memory location, you only need to press one button to make the call. Storing One-Touch Memories 1. Press p. 2. Enter the telephone number to be stored (up to 22 digits). Press p. 3. Enter name. Press the corresponding number key one or more times for the first letter (refer to the table on page 6). Press p. 4. Select a One-Touch memory location (M1-M16) by pressing the corresponding button. Please note! If you need to insert a pause in the telephone number press r. If you need to change a number, store the new number in the same location as the old one. Dialling using One-Touch Memories 1. Lift the handset (or press s) and wait for a dial tone. 2. Select the required One-Touch memory location (M1-M16) by pressing the corresponding button. EN 8

12 English Caller ID Explanation of Caller ID Caller ID allows you to see who is calling before you answer a call or to see who has called in your absence. If the number received is stored in the Phone book its associated name will be displayed instead. The CID memory will store up to 30 names/telephone numbers stored chronologically. The sequence number is shown in the top right-hand side of the display. When the memory is full, the oldest number will be deleted automatically as the new call is logged. New calls are indicated in plain text in the display. Please note! In order for numbers to be shown you must subscribe to the Caller ID service provided by your network operator, and a current subscription in place. Contact your operator for more information. Retrieving and dialling incoming numbers 1. Press repeatedly until the symbol is displayed. 2. Scroll through the entries using v/v. 3. Press to dial the displayed number, or just wait to return to standby mode. If you wish, you can switch between handset mode and hands free mode during the call by simply pressing s. Caller ID Messages Apart from showing telephone numbers, the display can also show: OUT OF AREA It is an International call or a call from a PBX (no information received). PRIVATE The call comes from a blocked number or a PBX. T New number not previously displayed. Z (double envelope) Several calls have been received from the same telephone number. q The call was received while using the Call Waiting function. Message indication*. * Message indication can be erased manually by pressing C. EN 9

13 English Caller ID Deleting numbers 1. Scroll to the desired entry using v/v. 2. Press C, DELETE? is displayed, alternatively press and hold C until DELETE ALL? is displayed. 3. Press and hold C again until the telephone number disappears. Transferring numbers to the Phone book 1. Scroll to the desired entry using v/v. 2. Press p. 3. Press p again. To enter a name please refer to Changing phone numbers/names on page 7. EN 10

14 English Other Alarm settings When the alarm clock is activated will be displayed in the standby mode. Once the alarm clock goes off a tone will be heard for one minute, to switch off the alarm press any button on the telephone. 1. Press and hold v until the alarm setting flashes. 2. Scroll to the required function (off/on/repeat daily) using v/v. Press 0. To cancel the alarm, proceed to point Select the hour (00-23) using v/v. Press Select the minute/s using v/v. Press 0 repeatedly to return to standby mode. 5. To cancel the alarm while it is sounding, press 0 or lift and replace the handset. Connection of additional equipment On the side of the telephone there is a socket marked 8, this will allow additional telephone equipment i.e. cordless, modems etc to be connected allowing access to the telephone line. You can reconfigure the phone ports using the switch (1:2) on the underside of the telephone (behind the attached cover), so that the telephone port (1) and the outer port (2) are connected in parallel. Declaration of conformity Doro hereby declares that this product, Doro Congress 205, conforms with the essential requirements and other relevant regulations contained in the Directive 1999/5/EC. A copy of the manufacturer s declaration is available at EN 11

15 English Other Technical information Within the battery compartment located on the underside of the telephone you will find several switches, these switches determine certain technical parameters when connecting the telephone. To remove the cover carefully press a small screwdriver (up to Ø 2,5mm) or similar into the hole to the right of the cover. Recall time The recall button timing can be switched between either 100ms (AU/UK/EU)/ 300ms (FR)/600ms (NZ), using the R switch located on the underside of the telephone (within the battery compartment). Tone/Pulse (Europe only) Select the required dialling type, Tone ( ) or Pulse (...) using the / switch located on the underside of the telephone (within the battery compartment). Message Waiting indicator Some PBX systems use a function called Message Waiting. The telephone will indicate when a call was received by flashing the Massage Waiting light next to the display. The switch is located behind the battery cover on the underside of the telephone. The MW function operates differently depending on the PBX in question. Please contact the system controller for more information. The following four alternatives are available: LED+, LED-, ringer indicator ( ) and high DC voltage (HV). When the telephone is used in systems without a telephone exchange ( ) should be selected. EN 12
. Tone/Pulse (Europe only) Select the required dialling type, Tone ( ) or Pulse (...) using the / switch located on the underside of the telephone (within the battery compartment).")
16 English Other Troubleshooting Check that the telephone cord is undamaged and properly plugged in. Disconnect any additional equipment, extension cords and other telephones. If the problem is resolved, the fault is with other equipment. Test the equipment on another working line. If the product works, then the fault is probably with your line. Please inform your local telephone company. No number shown in display when ringing - In order for this feature to function, you must subscribe to the Caller ID service from your network provider. - If a text message is shown on the display, the call may be an international call (no data received), or from a private or withheld number. - It may not be possible to receive Caller ID information if the phone is connected to a PBX system. If the telephone still does not work, contact the place of purchase. Don t forget the receipt or a copy of the invoice. UK If you cannot resolve the fault using the faultfinder section, technical support is available on the Premium Rate Number: Calls cost 50 pence per minute (prices correct at the time of going to press), and is operational between 9AM - 5PM Monday-Friday excluding Bank Holidays. Alternatively, on: tech@doro-uk.com You can contact us in writing: Consumer Support Group, Doro UK Ltd., 22 Walkers Road, North Moons Moat, Redditch, Worcestershire, B98 9HE, (regarding any Spares or Technical query), or Telephoning (Spares only): Web site: Guarantee This product is guaranteed for a period of 12 months from the date of purchase. Proof of purchase is required for any service or support required during the guarantee period. This guarantee shall not apply to a fault caused by an accident or a similar incident or damage, liquid ingress, negligence, abnormal usage, not reasonably maintained or any other circumstances on the purchaser s part. Furthermore, this guarantee shall not apply to a fault caused by a thunderstorm or any other voltage fluctuations. This guarantee does not in any way affect your statutory rights. (As a matter of precaution, we recommend disconnecting the telephone during a thunderstorm.) EN 13
, or from a private or withheld number.")
17 English Other Australia and New Zealand Products permitted for connection to the telephone network are marked with in Australia and in New Zealand. These marks indicate the products comply with the regulations and can be used without concern in the country of purchase. If you believe this product is malfunctioning, please refer to the relevant section and/or consult the troubleshooting guide in this manual to ensure that you have followed the instructions carefully. As an alternative you can visit our web site for FAQ s or send an for a prompt reply. Guarantee This product is guaranteed for a period of 12 months from the date of purchase. Should you experience difficulties with the product, please contact us for assistance. If the product is then found to be faulty you will be asked to return it directly to us with a copy of the purchase receipt. This guarantee shall not apply to a fault caused by an accident or a similar incident or damage, liquid ingress negligence, abnormal usage, not reasonably maintained or any other circumstances on the purchaser s part. Furthermore, this guarantee shall not apply to a fault caused by a thunderstorm or lightning, excessive or any other voltage fluctuations or faults on the telephone line. (As a matter of precaution, we recommend disconnecting the telephone during a thunderstorm). This guarantee does not affect your statutory rights. AUSTRALIA NEW ZEALAND DORO Australia Pty Ltd Atlas Gentech (NZ) Limited PO Box 6760 Private Bag Baulkham Hills BC NSW 2153 Panmure Australia Auckland New Zealand Consumer Support Consumer Support Ph: Ph: Ph: (Toll Call) Fax: (02) Fax: (09) support@doro.com.au support@atlasgentech.co.nz Web site: EN 14

18 English Technical information REN (RN for New Zealand) The REN (Ringer Equivalence Number) or (RN) is of significance only if you wish to connect more than 1 telephone to your telephone line. A standard telephone line has a maximum REN capacity of 3 (RN of 5). It is possible to connect 3 devices with a REN of 1 (RN of 1) with no degradation to the product s performance. Exceeding this limit may cause the volume of the ringer in any phone to decrease or not ring at all. ALL PRODUCTS The grant of a Telepermit for any item of terminal equipment indicates only that Telecom has accepted that the item complies with the minimum conditions for connection to its network. It indicates no endorsement of the product by Telecom, nor does it provide any sort of warranty. Above all, it provides no assurance that any item will work correctly in all respects with another item of Telepermitted equipment of a different make or model, nor does it imply that any product is compatible with all of Telecom s network services. This equipment shall not be set to make automatic calls to the Telecom 111 Emergency Service. This equipment may not provide for the effective hand-over of a call to another device connected to the same line. This equipment should not be used under any circumstances that may constitute a nuisance to other Telecom Customers. EN 15

19 Français Installation Raccordement/Réglages de base 1. Reliez le cordon spiralé au combiné et à la fiche du téléphone marquée q. 2. Raccrochez le combiné sur la base. 3. Reliez le bloc d alimentation à la prise du téléphone marquée DC 9V et à la prise de courant. 4 Le réglage de l alarme clignote à l affichage. Dans le cas contraire, appuyez pendant environ 4 secondes sur la touche v. Le réglage de l alarme est décrit à la page Appuyez sur 0 pour continuer. 6. Atteignez la langue désirée avec les touches v/v. Appuyez sur Atteignez le contraste désiré (3=normal) avec les touches v/v. Appuyez sur Atteignez l heure désirée (00-23) avec les touches v/v. Appuyez sur Atteignez la minute désirée avec les touches v/v. Appuyez sur Atteignez le jour désiré avec les touches v/v. Appuyez sur Atteignez le mois désiré avec les touches v/v. Appuyez sur Atteignez la durée de pause désirée (2 secondes=normal) avec les touches v/v. Appuyez sur Pour protéger les données en mémoire en cas de coupure de courant, mettez les batteries (non fournies) en place conformément aux instructions de la page suivante. 14. Reliez le câble téléphonique fourni à la prise téléphonique et à la prise du téléphone marquée T. 15. Prenez le combiné : vous devez entendre la tonalité. 16. Vérifiez que le curseur de synchronisation de la touche R est bien sur 300 ms. Voir page 12 Informations techniques. Changer l horloge, l alarme, la langue ou le contraste Pour changer par la suite l horloge, l alarme, la langue ou le contraste, appuyez pendant environ 4 secondes sur la touche v et répétez les étapes mentionnées ci-dessus. FR 1
 avec les touches v/v. Appuyez sur 0. 8.")
20 Français Installation Mise en place des batteries Pour protéger les données en mémoire et pour pouvoir utiliser la présentation du nom/ numéro et d autres fonctions, le téléphone nécessite trois batteries AAA de 1,5V. Les batteries permettent aussi au téléphone de fonctionner pendant quelques jours. Le symbole s allume lorsque les batteries doivent être changées. N utilisez que des batteries de qualité. 1. Pour protéger les données en mémoire, vérifiez que la fiche du bloc d alimentation est correctement branchée. 2. Débranchez le câble téléphonique. 3. Retirez la trappe des piles en introduisant un petit outil (2,5mm diamètre max.) dans le trou situé sur le côté de la trappe. 4. Insérez les batteries en observant les marques de polarité (+ et -). 5. Remettez la trappe des piles en place. Afficheur En veille, la date et l heure sont affichées ainsi que le nombre total de numéros de téléphone enregistrés dans le JAP (Journal des appelants). Sonnerie Vous pouvez régler la sonnerie grâce aux boutons situés sous le téléphone (sous le couvercle à dévisser) : e n Volume de la sonnerie Mélodie Tonalité d appel Etiquettes/façade translucide Vous pouvez changer les étiquettes placées sous la façade translucide. Celle-ci est retenue par deux languettes en plastique fixées par deux vis à retirer en premier. Vous pouvez placer un logo ou d autres informations sous cette façade translucide. Ceci est particulièrement pratique lorsque le téléphone est orienté face à la clientèle. FR 2
 dans le trou situé sur le côté de la trappe. 4. Insérez les batteries en observant les marques de polarité (+ et -). 5.")
21 Français Utilisation Appeler Appel normal 1. Prenez le combiné. 2. Composez le numéro de votre correspondant. Appeler avec la fonction de correction Vous pouvez corriger un des chiffres du numéro de téléphone avant de le composer. 1. Composez le numéro. En cas d erreur, effacez avec la touche C. 2. Appuyez sur OU sur s pour lancer la numérotation. En cours de communication, vous pouvez alterner entre les modes combiné et haut-parleur. Touche Bis La touche r permet de rappeler les cinq derniers numéros composés : 1. Appuyez plusieurs fois sur r pour faire défiler ces numéros. 2. Appuyez sur OU sur s pour appeler le numéro choisi. En cours de communication, vous pouvez alterner entre les modes combiné et haut-parleur. Réglage du volume En cours de communication, le niveau du volume du casque ou du combiné peut être réglé au moyen des touches de réglage du volume. Utilisez la touche $ pour augmenter le volume et la touche pour le diminuer. Utilisez la molette 3 situé sur le côté droit du téléphone pour régler le volume du haut-parleur. Touche Secret En cours d appel, vous pouvez couper le micro du combiné en appuyant sur la touche z. Appuyez à nouveau sur cette touche pour réactiver le micro. La LED clignote tant que le micro est coupé. FR 3
22 Français Utilisation Fonction Mains-libres 1. Appuyez sur s. Le haut-parleur est activé et la LED à côté de la touche s allume. 2. Composez le numéro de téléphone. Au besoin, utilisez la touche située au dos du téléphone pour régler le volume du haut-parleur. 3. Parlez face au téléphone. 4. Appuyez sur s pour mettre fin à la communication. En cours de conversation vous pouvez alterner entre les modes combiné et haut-parleur. Remarque! Notez qu en position mains-libres les deux correspondants ne peuvent pas parler simultanément, mais uniquement un à la fois. L alternance entre celui qui parle et celui qui écoute se fait automatiquement, et elle est gérée par le niveau du son de la ligne téléphonique (votre correspondant) et celui du micro (votre discours). C est pourquoi il est important qu il n y ait pas trop de bruit dans l entourage du téléphone, comme par exemple de la musique à haut volume. Ecoute amplifiée Pour activer l écoute amplifiée en cours de communication, appuyez sur la touche s. Une fois activée, vous entendez votre correspondant au niveau du combiné ou du casque ainsi qu au niveau du haut-parleur de la base, ce qui permet aux personnes se trouvant à proximité de la base de suivre la conversation. 1. Composez le numéro de téléphone de votre correspondant. 2. Une fois la communication établie, appuyez sur s pour activer l écoute amplifiée. Vous entendez votre correspondant dans le micro. Le témoin à côté de la touche est allumé. 3. Au besoin, utilisez la molette située sur le côté droit du téléphone pour régler le volume du haut-parleur. 4. Pour désactiver l écoute amplifiée, appuyez à nouveau sur la touche s. FR 4
23 Français Utilisation Chronométrage des appels Lorsque la communication est établie, un chronomètre s affiche. Ce chronomètre vous permet de vérifier la durée des appels. Branchement du casque Le casque se raccorde à la fiche = située au dos du téléphone. Lorsque le casque est connecté, la touche = permet de prendre/libérer la ligne téléphonique (ce qui équivaut à prendre et à reposer le combiné). Remarque! Le casque DORO d origine est testé et adapté à ce téléphone. Vous pouvez utiliser d autres types ou marques de casques mais dans ce cas nous ne pourrons pas garantir leur qualité sonore et leur bon fonctionnement. Il est possible que le casque et le téléphone soient endommagés. La garantie du téléphone ne couvre pas ce type de dommage. Appel téléphonique avec casque 1. Appuyez sur la touche casque =. Vous entendez la tonalité d appel dans le casque et la LED en regard de la touche casque s allume. 2. Composez le numéro de téléphone souhaité. 3. Pour mettre fin à la communication, appuyez à nouveau sur la touche casque. Compatibilité appareil auditif Ce téléphone est compatible appareil auditif. Pour activer cette fonction, mettez votre appareil auditif sur T. FR 5
24 Français Répertoire Utilisation du répertoire Le répertoire permet d enregistrer les noms et numéros de téléphone. Il est plus rapide d appeler un numéro en mémoire que de le composer manuellement. Si vous êtes abonné à la présentation du numéro, le nom/numéro du correspondant s affiche à la réception d un appel (uniquement pour les numéros déjà dans le répertoire ou en mémoire). Le répertoire enregistre 20 jeux de noms et numéros de téléphone. Le répertoire est présenté en ordre alphabétique. Les noms ont 16 caractères maximum et les numéros de téléphone jusqu à 22 chiffres. Lettres Vous pouvez saisir les noms dans votre répertoire grâce aux touches numériques du téléphone y compris certains caractères spéciaux. Touche Lettres/symboles 1... [Espace] + & - / X A B C Å Ä Æ æ å ä ß D E F ë G H I ï J K L M N O Ñ ñ ö P Q R S T U V Ü ü W X Y Z 9 *... ( ) * < > 0...,. :? = 0 Ø #... $ _ %! # Enregistrer un nom/numéro 1. Appuyez plusieurs fois sur la touche b jusqu à ce que b s affiche. 2. Appuyez sur p. 3. Appuyez à nouveau sur p. 4. Composez le numéro de téléphone souhaité (22 chiffres maximum). Appuyez sur p. 5. Entrez le nom. Appuyez une ou plusieurs fois sur la touche numérotée correspondant à la première lettre (voir le tableau ci-dessus). Appuyez sur p. Insérez une pause en appuyant sur r. En cas de changement de numéro, remplacez l ancien par le nouveau. FR 6
design on speaking terms Manual Instrukcja obsługi Manuel d utilisation doro 509C
 design on speaking terms Manual Instrukcja obsługi Manuel d utilisation doro 509C Connection English 1. Connect the curly cord to the handset and to the socket marked q on the underside of the telephone.
USB firmware changing guide. Zmiana oprogramowania za przy użyciu połączenia USB. Changelog / Lista Zmian
 1 / 9 Content list / Spis Treści 1. Hardware and software requirements, preparing device to upgrade Wymagania sprzętowe i programowe, przygotowanie urządzenia do aktualizacji 2. Installing drivers and
Camspot 4.4 Camspot 4.5
 User manual (addition) Dodatek do instrukcji obsługi Camspot 4.4 Camspot 4.5 1. WiFi configuration 2. Configuration of sending pictures to e-mail/ftp after motion detection 1. Konfiguracja WiFi 2. Konfiguracja
Instrukcja Obsługi Telefonu CallCenter BH-208
 Instrukcja Obsługi Telefonu CallCenter BH-208 1.Wstęp. Dziękujemy za zainteresowanie się telefonem BH-208. Mamy nadzieję, że produkt spełni Państwa oczekiwania. Przed użyciem telefonu proszę zapoznać się
USB firmware changing guide. Zmiana oprogramowania za przy użyciu połączenia USB. Changelog / Lista Zmian
 1 / 12 Content list / Spis Treści 1. Hardware and software requirements, preparing device to upgrade Wymagania sprzętowe i programowe, przygotowanie urządzenia do aktualizacji 2. Installing drivers needed
Tuber radio BT MA407. Instrukcja obsługi User s Manual
 Tuber radio BT MA407 Instrukcja obsługi User s Manual User s Manual MA407 INSTRUCTIONS...4 BASIC...4 TROUBLESHOOTING...5 DATA TRANSFERRING / CHARGING VIA USB CABLE...5 INTERFACES...5 SPECIFICATIONS...6
Installation of EuroCert software for qualified electronic signature
 Installation of EuroCert software for qualified electronic signature for Microsoft Windows systems Warsaw 28.08.2019 Content 1. Downloading and running the software for the e-signature... 3 a) Installer
Rainbow Eye Bluetooth Speaker MA417 User s Manual
 Rainbow Eye Bluetooth Speaker MA417 User s Manual Opis funkcji: INSTRUKCJA OBSŁUGI Wbudowany Bluetooth 2.1 + bezprzewodowy moduł EDR Dzwięk audio przez Bluetooth, perfekcyjna jakość dzwięku oraz efekt
B IURO B ADAWCZE DS. J AKOŚCI
 ISO 9001 Q Ref. Certif. No. PL 2 IEC SYSTEM FOR MUTUAL RECOGNITION OF TEST CERTIFICATES FOR ELECTRICAL EQUIPMENT (IECEE) CB SCHEME SYSTEME CEI D ACCEPTATION MUTUELLE DE CERTIFICATS D ESSAIS DES EQUIPEMENTS
USB firmware changing guide. Zmiana oprogramowania za przy użyciu połączenia USB. Changelog / Lista Zmian
 1 / 14 Content list / Spis Treści 1. Hardware and software requirements, preparing device to upgrade Wymagania sprzętowe i programowe, przygotowanie urządzenia do aktualizacji 2. Installing drivers and
WYŁĄCZNIK CZASOWY OUTDOOR TIMER
 003-582 PL WYŁĄCZNIK CZASOWY Instrukcja obsługi (Tłumaczenie oryginalnej instrukcji) Ważny! Przed użyciem uważnie przeczytaj instrukcję obsługi! Zachowaj ją na przyszłość. EN OUTDOOR TIMER Operating instructions
DERBY 450 INSTRUKCJA OBSŁUGI
 APARAT TELEFONICZNY DERBY 450 INSTRUKCJA OBSŁUGI FUNKCJE: Identyfikacja rozmówcy FSK/DTMF Pamięć 30 numerów wejściowych, 5 wyjściowych i 40 VIP Tone/Pulse Regulacja głośności dzwonka Flash Pauza Powtarzanie
1 10 9 2 3 8 7 4 A/a 6 5
 doro 740 1 2 3 10 9 8 4 5 A/a 7 6 English (see page 4-31) 1 Left menu button 2 Scroll up/redial/pause button 3 Talk button/hands free function 4 Recall button 5 Microphone Polski (patrz strony 32-63) 1
INSTRUKCJE JAK AKTYWOWAĆ SWOJE KONTO PAYLUTION
 INSTRUKCJE JAK AKTYWOWAĆ SWOJE KONTO PAYLUTION Kiedy otrzymana przez Ciebie z Jeunesse, karta płatnicza została zarejestrowana i aktywowana w Joffice, możesz przejść do aktywacji swojego konta płatniczego
Witaj. Skrócona instrukcja obsługi. Podłączanie. Instalowanie. Podstawy obsługi
 Witaj Skrócona instrukcja obsługi 1 Podłączanie PL 2 3 Instalowanie Podstawy obsługi Zawartość opakowania Słuchawka Stacja bazowa Zasilacz stacji bazowej Kabel telefoniczny 2 akumulatory AAA (R03) Tylna
Zasady bezpieczeństwa
 2 3 Zasady bezpieczeństwa GB The door and the feeding flap must be closed when operating the machine! PL Drzwiczki i klapka szczeliny podawczej muszą być zamknięte w trakcie używania urządzenia! GB Ensure
Instrukcja obsługi. Radio z zegarem CRL-330
 Instrukcja obsługi Radio z zegarem CRL-330 www.denver-electronics.com Przed korzystaniem z tego produktu proszę uważnie i w pełni przeczytać tę instrukcję obsługi. Informacje o produkcie EN PL Correctly
POLITYKA PRYWATNOŚCI / PRIVACY POLICY
 POLITYKA PRYWATNOŚCI / PRIVACY POLICY TeleTrade DJ International Consulting Ltd Sierpień 2013 2011-2014 TeleTrade-DJ International Consulting Ltd. 1 Polityka Prywatności Privacy Policy Niniejsza Polityka
Instrukcja obsługi miernika zużycia energii. Operating Instructions for Power Meter
 POL SKI Instrukcja obsługi miernika zużycia energii Operating Instructions for Power Meter 406-074 PL EN Instrukcja obsługi w oryginale Operating instructions in original 20.06.2011 Jula AB POLSKI ZASADY
Terminal głosowy 6402 Podręcznik użytkownika. DEFINITY G3 - Wersja 6.3 lub późniejsze
 Terminal głosowy 6402 Podręcznik użytkownika DEFINITY G3 - Wersja 6.3 lub późniejsze 555-230-757PL Issue 1, July 2000 Copyright 1998 Lucent Technologies Wszelkie prawa zastrzeżone Uwaga Pomimo wszelkich
 www.irs.gov/form990. If "Yes," complete Schedule A Schedule B, Schedule of Contributors If "Yes," complete Schedule C, Part I If "Yes," complete Schedule C, Part II If "Yes," complete Schedule C, Part
APARAT TELEFONICZNY DERBY 400 INSTRUKCJA OBSŁUGI
 APARAT TELEFONICZNY DERBY 400 INSTRUKCJA OBSŁUGI SPIS TREŚCI: 1. FUNKCJE APARATU... 1 2. PROGRAMOWANIE... 2 a. Ustawianie daty i czasu... 2 b. Ustawianie kodu centrali PBX... 2 c. Ustawianie kodu strefowego...
Car MP3 Player MM211. Aby zapewnić prawidłową obsługę sprzętu zapoznaj się dokładnie z instrukcją i zachowaj ją na przyszłość.
 Car MP3 Player MM211 Aby zapewnić prawidłową obsługę sprzętu zapoznaj się dokładnie z instrukcją i zachowaj ją na przyszłość. To ensure proper use of this product please read this User s Manual carefully
EN Desktop Weather Station Instruction Manual
 V3067 EN Desktop Weather Station Instruction Manual Introduction This desktop weather station comes with weather prediction, clock, calendar, day, temperature and humidity display. It is battery powered
Hippo Boombox MM209N CD. Instrukcja obsługi User s Manual
 Hippo Boombox Instrukcja obsługi User s Manual OPIS PRZYCISKÓW: PL ON-OFF/MODE: 1. Włącz on/off: Naciśnij przycisk, aby włączyć urządzenie. Przytrzymaj dłużej, aby wyłączyć. 2. MODE: Wybierz źródło sygnału:
[ROBOKIDS MANUAL] ROBOROBO
![[ROBOKIDS MANUAL] ROBOROBO](/thumbs/24/4313056.jpg "[ROBOKIDS MANUAL] ROBOROBO") 1 2 When you plug in or unplug the cable, be sure to insert pressing the hook of the connection cable. If you want to input the program to your robot, you should first connect the Card reader with the
1 2 When you plug in or unplug the cable, be sure to insert pressing the hook of the connection cable. If you want to input the program to your robot, you should first connect the Card reader with the
Telefon TEL36CLIP Nr produktu 000923308
 INSTRUKCJA OBSŁUGI Telefon TEL36CLIP Nr produktu 000923308 Strona 1 z 13 2 Uruchomienie telefonu Informacje w zakresie bezpieczeństwa Uwaga: przed przygotowaniem telefonu do użycia należy koniecznie zapoznać
METHOD 2 -DIAGNOSTIC OUTSIDE
 VW MOTOMETER BOSCH METHOD 1 - OBD 2 METHOD 2 -DIAGNOSTIC OUTSIDE AFTER OPERATION YOU MUST DISCONECT ACU OR REMOVE FUSE FOR RESTART ODOMETER PO ZROBIENIU LICZNIKA ZDJĄĆ KLEMĘ LUB WYJĄĆ 2 BEZPIECZNIKI OD
Freedom Wireless Headphone MM65. Instrukcja obsługi User s Manual
 Freedom Wireless Headphone MM65 Instrukcja obsługi User s Manual Manual INSTALLATION... 4 WIRELESS NET AUDIO CHAT... 5 WIRELESS MONITORING... 5 LISTEN TO THE RADIO... 5 WIRED HEADPHONE (WITHOUT BATTERIES)...
F 18 GARANTIE. Notice d utilisation et d installation
 Notice d utilisation et d installation GARANTIE Installation and operating manual/ Gebruiks en installatiehandleiding / Manual de utilización e instalación / Manual do Utilizador e de Instalação /. Instrukcja
ORIGINAL USER MANUAL. Remote Control Z-Wave NC 896-GB IU/ZRH12/ /F
 WARRANTY The manufacturer guarantees correct device functioning. It also undertakes to repair or replace faulty device if damage is a result of material or structural faults. The warranty period is 2 months
FOREST DIAMOND Pilot radiowy X460
 FOREST DIAMOND Pilot radiowy - 520109X460 SPECYFIKACJA TECHNICZNA: 3V bateria typu: CR2450 zasięg nadajnika maks. 30 m żywotność baterii do 3 lat zakres temp. pracy:-10 C - +50 C częstotliwość 433.92MHz
LED MAGIC BALL MP3 F
 USER MANUAL / INSTRUKCJA OBSŁUGI LED MAGIC BALL MP3 F7000623 LED MAGIC BALL MP3 F7000623 Table of contents 1 Introduction... 2 2 Safety information... 2 3 Product information... 2 3.1 Specification...
SSW1.1, HFW Fry #20, Zeno #25 Benchmark: Qtr.1. Fry #65, Zeno #67. like
 SSW1.1, HFW Fry #20, Zeno #25 Benchmark: Qtr.1 I SSW1.1, HFW Fry #65, Zeno #67 Benchmark: Qtr.1 like SSW1.2, HFW Fry #47, Zeno #59 Benchmark: Qtr.1 do SSW1.2, HFW Fry #5, Zeno #4 Benchmark: Qtr.1 to SSW1.2,
 www.irs.gov/form990. If "Yes," complete Schedule A Schedule B, Schedule of Contributors If "Yes," complete Schedule C, Part I If "Yes," complete Schedule C, Part II If "Yes," complete Schedule C, Part
Samurai SHARK SH903. RF Combo Wireless Mouse & Keyboard
 Samurai SHARK SH903 RF Combo Wireless Mouse & Keyboard Instrukcja obsługi Instalacja baterii SH903-Samurai Uwaga! Bezprzewodowa myszka optyczna używa baterii typu AAA. Żeby osiągnąć najlepszą wydajność
Indoor wireless headphones
 Register your product and get support at www.philips.com/welcome Indoor wireless headphones SHC8535 SHC8575 PL Instrukcja obsługi SHC8535 SHC8535 A a b B a c d b e f c C D E F a G b H I 1 Zawartość opakowania
INSTRUKCJA OBSŁUGI ELEKTRONICZNA STACJA POGODY
 No 170601 INSTRUKCJA OBSŁUGI ELEKTRONICZNA STACJA POGODY Ta instrukcja jest częścią produktu i powinna być przechowywana w sposób umożliwiający zapoznanie się z jej treścią w przyszłości. Zawiera istotne
Witamy. Pierwsze kroki. Podłączenie. Instalacja. Użytkowanie
 Cyfrowy telefon bezprzewodowy SE 140 Cyfrowy telefon bezprzewodowy z automatem zgłoszeniowym SE 145 Witamy Pierwsze kroki 1 2 3 Podłączenie Instalacja Użytkowanie Zawartość opakowania Słuchawka SE140/SE145
DO MONTAŻU POTRZEBNE SĄ DWIE OSOBY! INSTALLATION REQUIRES TWO PEOPLE!
 1 HAPPY ANIMALS B09 INSTRUKCJA MONTAŻU ASSEMBLY INSTRUCTIONS Akcesoria / Fittings K1 M M1 ZM1 Z T G1 17 szt. / pcs 13 szt. / pcs B1 13 szt. / pcs W4 13 szt. / pcs W6 14 szt. / pcs U1 1 szt. / pcs U N1
SMS-8010. SMS telefon. Umożliwia łatwe i szybkie wysyłanie wiadomości SMS...
 SMS-8010 SMS telefon Umożliwia łatwe i szybkie wysyłanie wiadomości SMS... Spis treści: 1. Główne funkcje telefonu SMS-8010?... 3 2. Instalacja... 4 3. Ustawianie daty i czasu... 4 4. Rozmowy telefoniczne...
BLACKLIGHT SPOT 400W F
 BLACKLIGHT SPOT 400W F2000339 USER MANUAL / INSTRUKCJA OBSŁUGI BLACKLIGHT SPOT 400W F2000339 Table of Contents 1 Introduction... 2 2 Safety information... 2 3 Product information... 2 3.1 Specification...
Moduł odtwarzacza plików MP3 audio
 Gotronik PPHU Dane aktualne na dzień: 19-01-2017 09:19 Link do produktu: /modul-odtwarzacza-plikow-mp3-audio-p-2905.html Moduł odtwarzacza plików MP3 audio Cena Dostępność Numer katalogowy 35,00 zł Dostępny
Instrukcja obsługi User Guide
 Aparat telefoniczny przeznaczony do stosowania w publicznej sieci telefonicznej PSTN Model KXT480 Instrukcja obsługi User Guide POLSKI Spis treści Dane techniczne:... 4 Funkcje... 4 Zawartość opakowania...
Skrócona instrukcja obsługi
 Zarejestruj produkt i uzyskaj pomoc na stronie www.philips.com/welcome CD250 CD255 SE250 SE255 Skrócona instrukcja obsługi 1 Podłącz 2 Zainstaluj 3 Korzystaj Zawartość opakowania Stacja bazowa LUB Słuchawka
Universal Bluetooth speaker
 Universal Bluetooth speaker Owner s manual Instrukcja obsługi EN PL Safety instructions Owner s manual 1. Read this instruction manual before first use, and keep it for future reference. Producer is not
Aktualizacja Oprogramowania Firmowego (Fleszowanie) Microprocessor Firmware Upgrade (Firmware downloading)
 Microprocessor Firmware Upgrade (Firmware downloading)") Aktualizacja Oprogramowania Firmowego (Fleszowanie) Microprocessor Firmware Upgrade (Firmware downloading) ROGER sp.j. Gościszewo 59 82-416 Gościszewo Poland tel. 055 2720132 fax 055 2720133 www.roger.pl
Aktualizacja Oprogramowania Firmowego (Fleszowanie) Microprocessor Firmware Upgrade (Firmware downloading) ROGER sp.j. Gościszewo 59 82-416 Gościszewo Poland tel. 055 2720132 fax 055 2720133 www.roger.pl
PY-FM01. Patent N.O.: BLUETOOTH CAR KIT WITH FM MODULATOR
 EN Patent N.O.: 200830101862.9 BLUETOOTH CAR KIT WITH FM MODULATOR 1 FEATURES AND FUNCTIONS Bluetooth Hand-free Car Kit 1 Bluetooth A2DP wireless music transmission, hand-free car kit for dialing and conversation.
MM210. Instrukcja obsługi User s Manual
 Chilli Boombox Instrukcja obsługi User s Manual OPIS PRZYCISKÓW: PL ON-OFF/MODE: 1. Włącz on/off: Naciśnij przycisk, aby włączyć urządzenie. Przytrzymaj dłużej, aby wyłączyć. 2. MODE: Wybierz źródło sygnału:
CONTENTS. Introduction 1 Your telephone 2. Base settings 19. Registration 22. Getting started 7. Appendix 24
 CONTENTS Introduction 1 Your telephone 2 Unpacking 2 Your base 2 Your handset 3 Connecting the base 4 Handset set-up 5 Telephone set turning on and off 5 Replacing the batteries 6 Getting started 7 Making
Odbiornik z wyświetlaczem
 Odbiornik z wyświetlaczem GEN-910 Przed włączeniem zapoznaj się z treścią niniejszej instrukcji. Zaleca się zachować instrukcję na przyszłość. Genway - pomoc techniczna tel. +48 (24) 366 88 26 e-mail:
Zasady rejestracji i instrukcja zarządzania kontem użytkownika portalu
 Zasady rejestracji i instrukcja zarządzania kontem użytkownika portalu Rejestracja na Portalu Online Job Application jest całkowicie bezpłatna i składa się z 3 kroków: Krok 1 - Wypełnij poprawnie formularz
BeoCom 2. Instrukcja obsługi
 BeoCom 2 Instrukcja obsługi Zanim rozpoczniesz instalację Niniejszy podręcznik zawiera instrukcje w jaki sposób skonfigurować i używać słuchawki BeoCom 2 wraz ze stacją bazową BeoLine. Słuchawka może być
Wireless telephone ML0657
 Wireless telephone ML0657 Owner s manual EN Instrukcja obsługi PL 1. GETTING STARTED Owner s manual Please read this manual carefully before using this device, and keep it for future use. Due to different
Zestaw głośnomówiący B-Speech BT-FSE PRIM
 INSTRUKCJA OBSŁUGI Zestaw głośnomówiący B-Speech BT-FSE PRIM Nr produktu 769722 Strona 1 z 6 Gratulujemy zakupu zestawu głośnomówiącego B-Speech BT-FSE PRIM. To urządzenie pozwala komunikować się bezprzewodowo
Wireless telephone ML0658
 Wireless telephone ML0658 Owner s manual EN Instrukcja obsługi PL Owner s manual 1. INTRODUCTION Before the first use, read this instruction manual carefully and keep it for future use. Specifications
Wireless telephone ML0656
 Wireless telephone ML0656 Owner s manual EN Instrukcja obsługi PL 1. GETTING STARTED Owner s manual This user guide provides you with all the information you need to get the most from your phone. Before
Instrukcja obsługi wersja skrócona Aparat telefoniczny przewodowy MT-571 Alicja
 Instrukcja obsługi wersja skrócona Aparat telefoniczny przewodowy MT-571 Alicja Dziękujemy za zakup produktu naszej marki. Przed pierwszym użyciem urządzenia prosimy o zapoznanie się z treścią instrukcji
Telefon z dużymi przyciskami Audio-Line Bigtel 49 Plus. Instrukcja obsługi. Nr produktu Strona 1 z 20
 Telefon z dużymi przyciskami Audio-Line Bigtel 49 Plus Instrukcja obsługi Nr produktu 923341 Strona 1 z 20 Uruchamianie telefonu Podłączanie telefonu Należy podłączyć telefon tak, jak przedstawiono na
BeoCom 4. Instrukcja obsługi
 BeoCom 4 Instrukcja obsługi Zanim rozpoczniesz instalację zestawu W jaki sposób korzystać z tej instrukcji obsługi Skorzystaj z poniższej legendy, aby dowiedzieć się, jak wygląda przycisk lub wyświetlacz
Owner s manual. English
 Owner s manual English English Owner s manual Owner s manual English English Owner s manual Owner s manual English English Owner s manual Owner s manual English English Owner s manual Owner s manual English
Instrukcja obsługi cyfrowego tygodniowego wyłącznika czasowego. Operating Instructions for Digital Weekly Timer
 Instrukcja obsługi cyfrowego tygodniowego wyłącznika czasowego Operating Instructions for Digital Weekly Timer 406-073 SV NO PL EN Bruksanvisning i original Bruksanvisning i original Instrukcja obsługi
LED WASHER 30x3W WHITE IP65 F
 USER MANUAL / INSTRUKCJA OBSŁUGI LED WASHER 30x3W WHITE IP65 F7200171 LED WASHER 30x3W WHITE IP65 F7200171 Table of contents 1 Introduction... 2 2 Safety information... 2 3 Product information... 2 3.1
 Owner s manual EN Owner s manual EN Owner s manual EN Owner s manual EN Owner s manual EN Owner s manual EN Owner s manual EN Owner s manual EN Owner s manual EN Owner s manual EN Owner s manual EN Owner
USB firmware changing guide. Zmiana oprogramowania za przy użyciu połączenia USB. Changelog / Lista Zmian
 1 / 8 Content list / Spis Treści 1. Hardware and software requirements, preparing device to upgrade Wymagania sprzętowe i programowe, przygotowanie urządzenia do aktualizacji 2. Installing drivers and
Radio przenośne Sangean PR-D5, FM, AM, RDS, białe
 INSTRUKCJA OBSŁUGI Radio przenośne Sangean PR-D5, FM, AM, RDS, białe Nr produktu 343515 Strona 1 z 6 Elementy sterowania 1. Przycisk zasilania 2. Sygnał AUX-in 3. Wybór pasma i strojenie 4. Alarm 5. Wyświetlacz
Surname. Other Names. For Examiner s Use Centre Number. Candidate Number. Candidate Signature
 A Surname _ Other Names For Examiner s Use Centre Number Candidate Number Candidate Signature Polish Unit 1 PLSH1 General Certificate of Education Advanced Subsidiary Examination June 2014 Reading and
Skrócona instrukcja obsługi
 Zarejestruj produkt i uzyskaj pomoc na stronie www.philips.com/welcome SE350 Skrócona instrukcja obsługi 1 Podłącz 2 Zainstaluj 3 Korzystaj Zawartość opakowania Słuchawka Stacja bazowa LUB Tylna klapka
Raport bieżący: 44/2018 Data: g. 21:03 Skrócona nazwa emitenta: SERINUS ENERGY plc
 Raport bieżący: 44/2018 Data: 2018-05-23 g. 21:03 Skrócona nazwa emitenta: SERINUS ENERGY plc Temat: Zawiadomienie o zmianie udziału w ogólnej liczbie głosów w Serinus Energy plc Podstawa prawna: Inne
HAPPY ANIMALS L01 HAPPY ANIMALS L03 HAPPY ANIMALS L05 HAPPY ANIMALS L07
 HAPPY ANIMALS L0 HAPPY ANIMALS L0 HAPPY ANIMALS L0 HAPPY ANIMALS L07 INSTRUKCJA MONTAŻU ASSEMBLY INSTRUCTIONS Akcesoria / Fittings K ZW W8 W7 Ø x 6 szt. / pcs Ø7 x 70 Narzędzia / Tools DO MONTAŻU POTRZEBNE
Zarządzanie sieciami telekomunikacyjnymi
 SNMP Protocol The Simple Network Management Protocol (SNMP) is an application layer protocol that facilitates the exchange of management information between network devices. It is part of the Transmission
Jak otrzymać zwrot części zapłaty Poradnik
 Jak otrzymać zwrot części zapłaty Poradnik Poniżej znajdziesz wskazówki, które mogą okazać się przydatne podczas wypełnienia zgłoszenia koniecznego do odzyskania części zapłaty za zakupione w promocji
HAPPY ANIMALS L02 HAPPY ANIMALS L04 HAPPY ANIMALS L06 HAPPY ANIMALS L08
 HAPPY ANIMALS L02 HAPPY ANIMALS L04 HAPPY ANIMALS L06 HAPPY ANIMALS L08 INSTRUKCJA MONTAŻU ASSEMBLY INSTRUCTIONS Akcesoria / Fittings K O G ZW W8 W4 20 szt. / pcs 4 szt. / pcs 4 szt. / pcs 4 szt. / pcs
SLU0056. Multifunctional Wireless Stereo Headphone
 SLU0056 Multifunctional Wireless Stereo Headphone Owner s manual Instrukcja obsługi EN PL Owner s manual 1. Technical parameter Bluetooth Protocol Frequency range Effective distance FM frequency range
Pomoc do programu konfiguracyjnego RFID-CS27-Reader User Guide of setup software RFID-CS27-Reader
 2017-01-24 Pomoc do programu konfiguracyjnego RFID-CS27-Reader User Guide of setup software RFID-CS27-Reader Program CS27 Reader należy uruchomić przez wybór opcji CS27 i naciśnięcie przycisku START. Programme
Rev Źródło:
 KamPROG for AVR Rev. 20190119192125 Źródło: http://wiki.kamamilabs.com/index.php/kamprog_for_avr Spis treści Introdcution... 1 Features... 2 Standard equipment... 4 Installation... 5 Software... 6 AVR
Instrukcja konfiguracji usługi Wirtualnej Sieci Prywatnej w systemie Mac OSX
 UNIWERSYTETU BIBLIOTEKA IEGO UNIWERSYTETU IEGO Instrukcja konfiguracji usługi Wirtualnej Sieci Prywatnej w systemie Mac OSX 1. Make a new connection Open the System Preferences by going to the Apple menu
Helena Boguta, klasa 8W, rok szkolny 2018/2019
 Poniższy zbiór zadań został wykonany w ramach projektu Mazowiecki program stypendialny dla uczniów szczególnie uzdolnionych - najlepsza inwestycja w człowieka w roku szkolnym 2018/2019. Składają się na
DC UPS. User Manual. Page 1
 DC UPS User Manual Page 1 1. Specyfikacja 1.1 Zasilacz PowerWalker DC UPS 12V jest innowacyjnym rozwiązaniem do zasilania prądem stałym o napięciu 12 VDC urządzeń do max 30W (2,5 A) obciążenia. W urządzeniu
DVD MAKER USB2.0 Instrukcja instalacji
 DVD MAKER USB2.0 Instrukcja instalacji Spis treści V1.0 Rozdział1: Instalacja karty telewizyjnej DVD MAKER USB2.0...2 1.1. Zawartość opakowania...2 1.2. Wymagania systemowe...2 1.3. Instalacja sprzętu...2
Wykaz linii kolejowych, które są wyposażone w urządzenia systemu ETCS
 Wykaz kolejowych, które są wyposażone w urządzenia W tablicy znajdującej się na kolejnych stronach tego załącznika zastosowano następujące oznaczenia: - numer kolejowej według instrukcji Wykaz Id-12 (D-29).
Smart bracelet Instrukcja obłsugi(pl)
") Smart bracelet Instrukcja obłsugi(pl) Zegarek smart watch l12s współpracuje z większości telefonów z oprogramowaniem Android w wersji >2.3 aby móc w pełni korzystać z funkcjonalności zegarka należy używać
Smart bracelet Instrukcja obłsugi(pl) Zegarek smart watch l12s współpracuje z większości telefonów z oprogramowaniem Android w wersji >2.3 aby móc w pełni korzystać z funkcjonalności zegarka należy używać
Stoper solarny C5085 INSTRUKCJA OBSŁUGI. Nr produktu Strona 1 z 7
 INSTRUKCJA OBSŁUGI Stoper solarny C5085 Nr produktu 860746 Strona 1 z 7 1.Zastosowanie Stoper ten posiada cechy mierzenie ilości okrążeń oraz podzielone funkcje czasowe. Stoper wyświetla również datę i
 !850016! www.irs.gov/form8879eo. e-file www.irs.gov/form990. If "Yes," complete Schedule A Schedule B, Schedule of Contributors If "Yes," complete Schedule C, Part I If "Yes," complete Schedule C,
ATM (Automatic Teller Machine)
") Instructions ENGLISH Wskazówki POLISH This document is to help consumers in understanding basic functionality in their own language. Should you have any difficulty using any of the functions please review
Instructions ENGLISH Wskazówki POLISH This document is to help consumers in understanding basic functionality in their own language. Should you have any difficulty using any of the functions please review
Jazz EB207S is a slim, compact and outstanding looking SATA to USB 2.0 HDD enclosure. The case is
 1. Introduction Jazz EB207S is a slim, compact and outstanding looking SATA to USB 2.0 HDD enclosure. The case is made of aluminum and steel mesh as one of the coolest enclosures available. It s also small
JABRA STORM. Instrukcja obsługi. jabra.com/storm
 Instrukcja obsługi jabra.com/storm 2014 GN A/S / GN Netcom US, Inc. Wszelkie prawa zastrzeżone. Jabra jest zarejestrowanym znakiem towarowym firmy GN Netcom A/S. Wszystkie pozostałe znaki towarowe użyte
Wykaz linii kolejowych, które są wyposażone w urzadzenia systemu ETCS
 Wykaz kolejowych, które są wyposażone w urzadzenia W tablicy znajdującej się na kolejnych stronach tego załącznika zastosowano następujące oznaczenia: - numer kolejowej według instrukcji Wykaz Id-12 (D-29).
Instrukcja obsługi. MHL to HDMI Adapter IM750
 Instrukcja obsługi MHL to HDMI Adapter IM750 Spis treści Wprowadzenie...3 Omówienie podstawki MHL to HDMI Adapter...3 Pierwsze kroki...4 Smart Connect...4 Uaktualnianie Smart Connect...4 Używanie podstawki
Przeciwpożarowe sterowniki dla bram zwijanych, sekcyjnych i przesuwnych. Fire-proof controls for roller shutters, sectional doors and sliding gates
 Przeciwpożarowe napędy bram Charakterystyka Characteristics Fire-proof door drives 36 Przeciwpożarowe sterowniki dla bram zwijanych, sekcyjnych i przesuwnych Fire-proof controls for roller shutters, sectional
KWS. Instrukcja obsługi User's manual Manuel d utilisation Руководство по эксплуатации RMSI25, RMSI63
 1 Instrukcja obsługi User's manual Manuel d utilisation Руководство по эксплуатации RMSI25, RMSI63 Uwaga! Niebezpieczne napięcie może spowodować porażenie lub pożar. W związku z prowadzoną polityką ciągłego
Instalacja Właściwości
 Instalacja Instrukcje instalacji Windows XP / Vista / Win7 / Win8 1. Pobierz instalatora silnika makro HOST z oficjalnej strony sieci web IABYTE. 2. Uruchom instalatora i wykonaj instrukcje ekranowe. 3.
HAPPY K04 INSTRUKCJA MONTAŻU ASSEMBLY INSTRUCTIONS DO MONTAŻU POTRZEBNE SĄ DWIE OSOBY! INSTALLATION REQUIRES TWO PEOPLE! W5 W6 G1 T2 U1 U2 TZ1
 HAPPY K0 INSTRUKCJA MONTAŻU ASSEMBLY INSTRUCTIONS W Akcesoria / Fittings W W G K szt. / pcs M Ø Ø 0 Ø, Ø Ø. 0 ø8 M 8 szt. / pcs 0 szt. / pcs szt. / pcs T U U szt. / pcs szt. / pcs szt. / pcs S TZ szt.
LEARNING AGREEMENT FOR STUDIES
 LEARNING AGREEMENT FOR STUDIES The Student First and last name(s) Nationality E-mail Academic year 2014/2015 Study period 1 st semester 2 nd semester Study cycle Bachelor Master Doctoral Subject area,
CPX Cisco Partner Excellence CSPP program partnerski
 CPX Cisco Partner Excellence CSPP program partnerski Hotel Double Tree by Hilton Łukasz Wilkowski Distributor Service Development Manager lwilkows@cisco.com Łódź 14 maja 2015 - Cisco Service Partner Program
Xperia TX TV Dock DK22 Xperia T TV Dock DK23
 Instrukcja obsługi Xperia TX TV Dock DK22 Xperia T TV Dock DK23 Spis treści Wprowadzenie...3 Omówienie podstawki TV Dock...3 Pierwsze kroki...4 Smart Connect...4 Uaktualnianie Smart Connect...4 Używanie
DERBY 500 INSTRUKCJA OBSŁUGI APARATU TELEFONICZNEGO 1. FUNKCJE: 2. PIERWSZE WŁĄCZENIE TELEFONU 3. PROGRAMOWANIE
 INSTRUKCJA OBSŁUGI APARATU TELEFONICZNEGO DERBY 500 1. FUNKCJE: Identyfikacja rozmówcy - FSK/DTMF Książka telefoniczna 112 numerów,91 numerów VIP 10 wersji językowych Regulacja jasności wyświetlacza Wyświetla
ARNOLD. EDUKACJA KULTURYSTY (POLSKA WERSJA JEZYKOWA) BY DOUGLAS KENT HALL
 BY DOUGLAS KENT HALL") Read Online and Download Ebook ARNOLD. EDUKACJA KULTURYSTY (POLSKA WERSJA JEZYKOWA) BY DOUGLAS KENT HALL DOWNLOAD EBOOK : ARNOLD. EDUKACJA KULTURYSTY (POLSKA WERSJA Click link bellow and free register
Read Online and Download Ebook ARNOLD. EDUKACJA KULTURYSTY (POLSKA WERSJA JEZYKOWA) BY DOUGLAS KENT HALL DOWNLOAD EBOOK : ARNOLD. EDUKACJA KULTURYSTY (POLSKA WERSJA Click link bellow and free register
Instrukcja obsługi. Xperia P TV Dock DK21
 Instrukcja obsługi Xperia P TV Dock DK21 Spis treści Wprowadzenie...3 Omówienie tyłu podstawki TV Dock...3 Pierwsze kroki...4 Menedżer LiveWare...4 Uaktualnianie Menedżer LiveWare...4 Używanie podstawki